Welcome to ermicroblog
Saturday April 27, 2024Are you looking for something fresh, update and simple explanation on the microcontrollers and electronics concept?
Here at ermicroblog we always bake fresh new projects,
tutorials, and ideas. Any sugestions and comments would be most welcome.
Have a pleasure reading and hope you enjoy visiting ermicroblog.
Feature Video
July 2017 Top 10 Pageviews
e-Book
Basic User’s Experiment Note
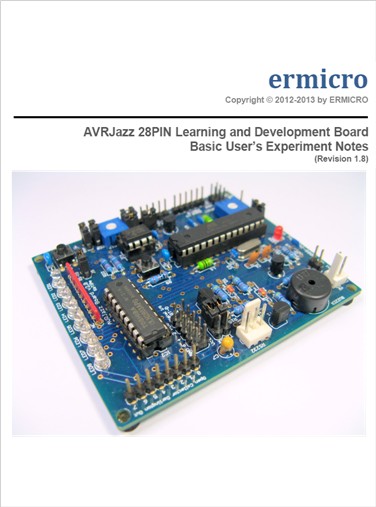
The “Basic User’s Experiment Note” is based on the popular 8-bit Atmel AVR ATmega328P microcontroller using AVRJazz 28PIN development board. This ebook covering most of the Atmel AVR ATmega328P microcontroller features and it’s aimed for the beginners, hobbyist, or anyone who wants to learn and understand the 8-bit Atmel AVR ATmega328P microcontroller powerful features. Read more »
Latest Entry
The LED Chasing Effect Project using Atmel AVR Microcontroller
Wednesday October 08, 2014 by rwb, under Microcontroller.
One of the interesting projects for most of the embedded beginners enthusiasts or hobbyists is to build the LED chasing effect. In this project we are going to use both the Arduino IDE and Atmel AVR Studio to program the AVR ATMega168 microcontroller, therefore you could learn to use these well known Integrated Development Environment (IDE) to program the project. Read more »
No Comments
Telepresence Robot using Microchip PIC16F1829 and Atmel AVR ATmega168 I2C Smart DC Motor Controller Microcontroller – Part 2
Thursday September 05, 2013 by rwb, under Robotics.
The I2C (read as I square C) smart DC motor controller is designed using the Atmel 8-bit AVR Atmega168 microcontroller and configured to act as the I2C slave device where it could be controlled by other microcontroller or microprocessor through the I2C SDA (serial data) and SCL (serial clock) interface. In the first part we have accomplished a basic DC motor controller tasks i.e. differential steering and speed control using pulse width modulation (PWM). Read more »
2 Comments
Building the I2C Smart DC Motor Controller with Atmel AVR Microcontroller – Part 1
Wednesday June 12, 2013 by rwb, under Microcontroller.
The idea of building my own I2C (read as I square C) smart DC motor controller is came to me when I was learning and playing together with my son on his LEGO® MINDSTORM® NXT 2.0 about a year ago. The NXT sophisticated controller also called NXT Intelligent Brick is powered by Atmel 32-bit ARM7 AT91SAM7S256 microcontroller and communicating with Atmel 8-bit AVR ATmega48 acting as a co-microcontroller using I2C protocol. Read more »
1 Comment
The ISP Breakout Board for Prototyping Your Electronic Circuit
Monday February 25, 2013 by rwb, under Yet Another Tips.
In many projects presented in this blog I used the breadboard for prototyping and building the projects. Literally breadboard is mean a piece of wood (board) we usually use to cut the bread, this term later used by many of earlier electronics experimenters to descript the board they used to construct and connect all the electronics components on the piece of wood board. The breadboard has many advantages as it allow us to prototype the electronic design before going into the production and to reuse the electronics components for another project which of course will reduce the component’s cost especially for the electronics beginners.
No Comments
Build your own stopwatch using Maxim MAX7219 Serially Interfaced, 8-Digit LED Display Drivers
Saturday December 29, 2012 by rwb, under Microcontroller.
One of the basic usage of the TIMER peripheral on every microcontroller is to provide the accurate timing mechanism. Using the TIMER peripheral as the basic timing, we could easily develop a stopwatch and display it to the 8-Digit seven segment numeric LED display. Thanks to the Maxim MAX7219 chip which enable us to interface this 8-Digit seven segment LED display much easier using just three wires of the SPI (serial peripheral interface) to display the hour, minute, second, and hundredth of seconds to the 8-Digit seven segments LED display.
1 Comment
The Year 2012 End Notes
Wednesday December 26, 2012 by rwb, under Blognote.
This year is becoming one of the busiest year for me as I have many projects to handle (i.e. not related to the embedded system), as you know I always love to play with the electronic and embedded system although my professional job is not related to my hobby, but I always enjoy learning and exploring a new thing especially the embedded system and I hope you share the same passion as I did. Read more »
No Comments
The Year 2011 End Notes
Saturday December 24, 2011 by rwb, under Blognote.
It’s been a wonderful year to be with you all the ermicroblog readers, in the next couple of days we are going to leave this year and stepping into the next year with more exciting projects to be done. As more and more wireless devices has been developed in this past few years, in the year 2012 we are going to explore some of popular wireless devices available on market. Read more »
No Comments
ermicroblog pages
Home | Login | Register | About
